Use Blacklist Actions on the Edit Order Page
Use Blacklist Manager actions on the WooCommerce edit order page to add, remove, and review suspect or blocked customer details.
The edit order page includes a Blacklist actions panel. Use it when you have reviewed an order and want to mark the customer details as suspicious, block them, or remove an incorrect blacklist entry.
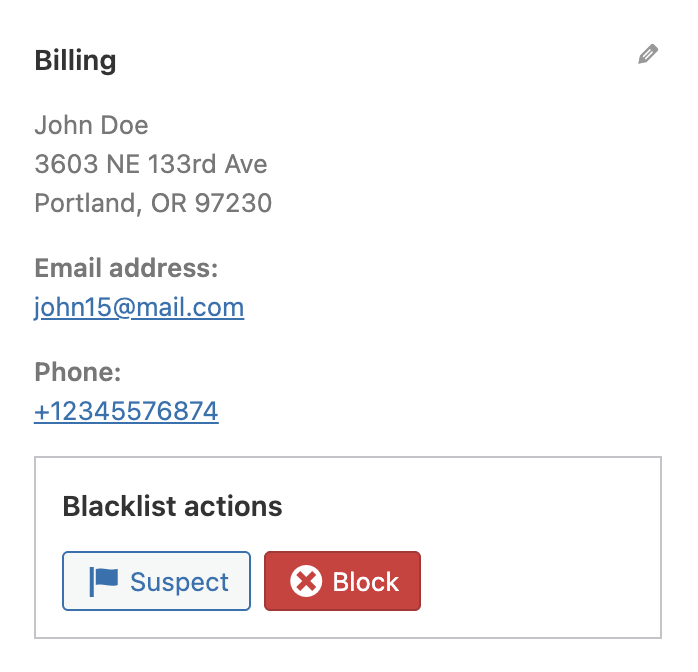
Where to Find the Panel
- Go to WooCommerce → Orders.
- Open an existing order.
- Look below the billing/customer details area for Blacklist actions.
The panel does not appear on new unsaved orders or subscription orders.
Who Can Use It
Admins can use the panel by default. If you use Premium permission settings, users with access to the Blacklist Manager dashboard can also manage the order blacklist actions.
This permission is controlled in Settings → Permission → Dashboard.
What Details Are Added
When you click Suspect or Block, the plugin uses details from the order. The exact details depend on which features are enabled.
| Order detail | Availability |
|---|---|
| Billing phone | Core plugin |
| Billing email | Core plugin |
| Customer IP address | When IP blocking is enabled |
| Customer name | Premium, when customer name blocking is enabled |
| Billing address | Premium, when customer address blocking is enabled |
| Shipping address | Premium, when shipping address blocking is enabled |
| Device identity | Premium, when device identity is enabled and the order has a valid device ID |
Add an Order to Suspects
Use Suspect when you are not ready to fully block the customer, but you want the details to be watched in future checks.
- Open the order.
- Click Suspect.
- Confirm the action.
- The plugin adds the available order details to the Suspects list.
The order receives an internal note showing that the customer was added to Suspects. Premium sites also record the manual action in the activity log.
Block a Customer From an Order
Use Block when the order is clearly fraudulent, abusive, or unwanted.
- Open the order.
- Click Block.
- Choose a reason such as stolen card, chargeback, fraud network, spam, policy abuse, or other.
- Add an internal note if needed.
- Confirm the block.
The selected reason helps your team understand why the customer was blocked later. If you choose Other, add a clear note.
Remove an Incorrect Entry
If a customer was added by mistake or later verified as legitimate, use Remove from the same order page.
- Open the related order.
- Click Remove.
- Choose the revoke reason, such as customer appeal, merchant error, payment provider decision, duplicate report, test data, or other.
- Add a note if needed.
- Confirm the removal.
Removing from the order page clears the blacklist state connected to that order. If device identity is enabled, the device record status is also synced.
Existing Match Notices
The order page can show notices when the order already matches Suspects or Blocklist details. These notices can mention the matched type, such as phone, email, IP, customer name, billing address, shipping address, or device identity.

Verified Email and Phone Icons
If the customer completed email or phone verification, Premium can show a verified checkmark beside the email or phone number in the billing details.
Use this as a helpful signal, not as the only decision. A verified phone/email means that specific contact method was verified; it does not automatically prove the whole order is safe.
IP Details
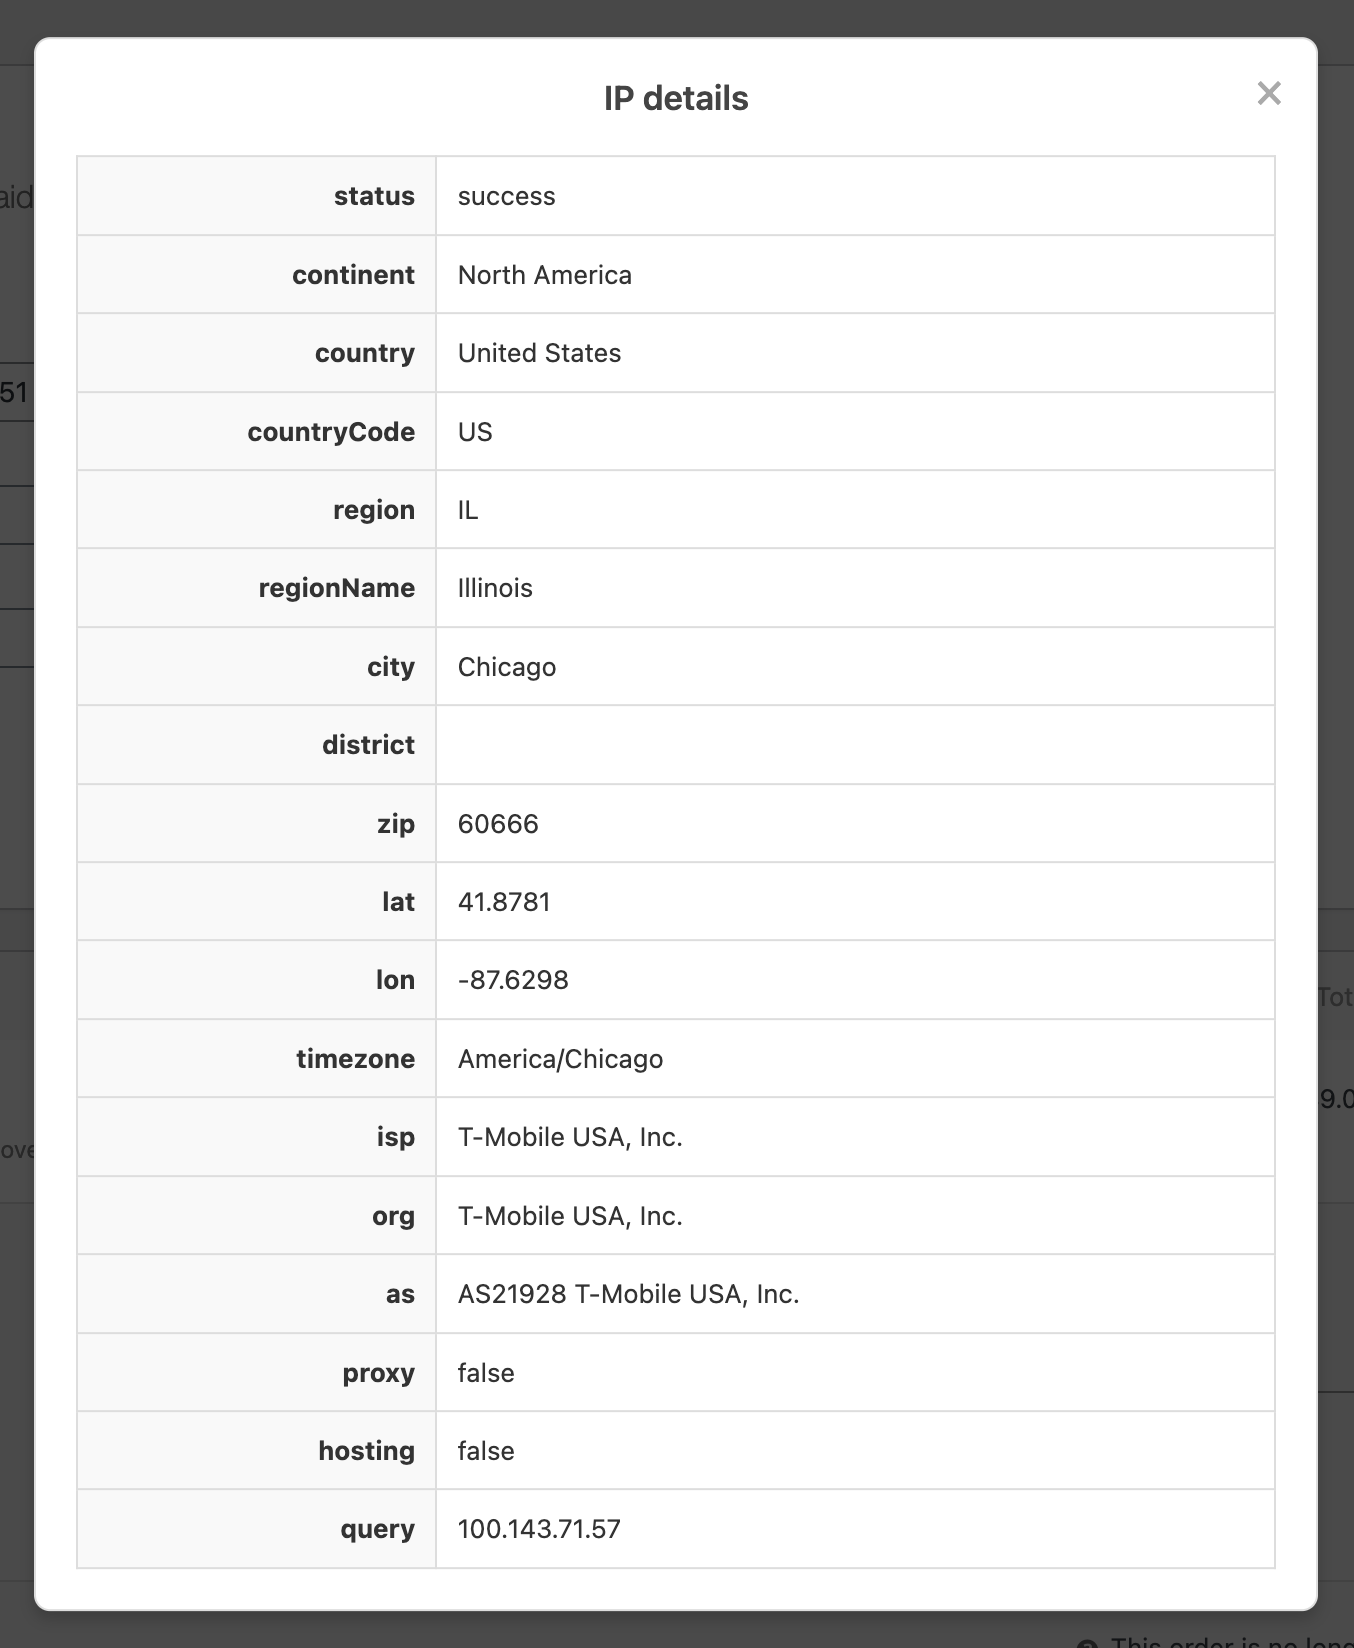
If IP details are enabled, the customer IP address on the order page becomes clickable. Click it to view IP information such as country, region, city, ISP, proxy status, hosting status, and timezone.
Device Details
If Device Identity is enabled and the order has a valid device ID, the order header can show a Device details link. Click it to view the device record.
The modal can show device ID, first seen, last seen, order count, linked users, emails, phones, IPs, last order ID, last IP, confidence, payload validity, browser ID, session ID, fingerprint hash, blocked status, and validation reasons.

Development Mode Notice
On a new installation, Blacklist Manager can show a development mode warning in the Blacklist actions area. If you are ready to enforce protection on the live store, switch the plugin to production mode.
Recommended Review Workflow
- Start from the Orders list and open risky orders first.
- Read the Order risk score details and Global fraud check if enabled.
- Check verified email/phone, IP details, and device details when available.
- Use Suspect when you want to watch the customer.
- Use Block only when the evidence is strong enough.
- Use Remove when the customer was incorrectly marked.
If you want to block a billing or shipping address from an order, see Block Billing and Shipping Addresses.
If the order belongs to a registered customer and you want to block that account too, see Block and Unblock WordPress Users.
Continue from Blacklist Manager Premium documentation to the complete product workflow.
Evaluate product scope on the money page, use the pillar Guide for decisions and trade-offs, and return here for exact configuration.
Did this guide answer your question?
Still stuck?
Open a support request and include this article title, your plugin version, and what you already tried.
Open Support